The Designer offers a tool to localize form’s controls’ localizable properties and store custom localized strings.
To add localization for a particular language the user can use any of these ways:
click the  Add localization icon on the Project panel’s toolbar
select Add Form Localization menu item from the Project panel context menu
This opens the Language Selection dialog where the user can choose the language of the localization.

Picture – Language selection dialog
After the user selects a language row and clicks the OK button or double-clicks a language row, the dialog closes, a localization resource file is created and added under the currently selected project item (in this case a selected form) and opened in the localization editor.
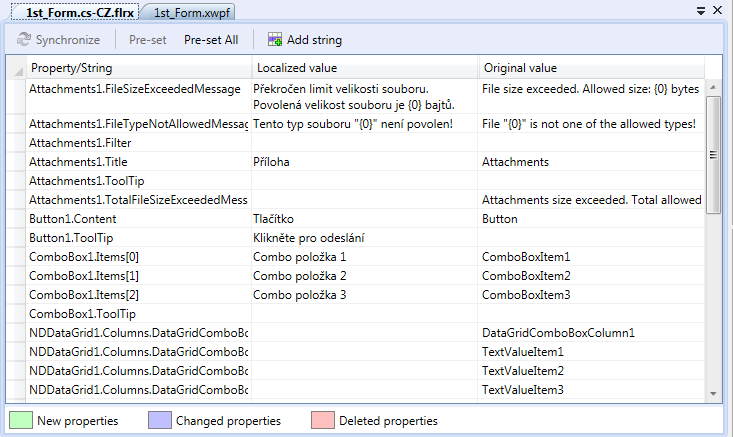
Picture – Localization editor
The toolbar of the localization editor contains these buttons:
Pre-set – sets localized values of all selected property rows to their respected original values.
Pre-set All – sets localized values to originals in all property rows.
 Add string – adds new custom localizable string item.
The example: Custom validations with localized messages shows how to use the custom localized strings in code-behind.